Quick answer: Foundation paper piecing is a quilting technique where fabric is sewn directly onto a printed paper pattern, following numbered sections for precise seams. It is especially popular for sharp points and intricate designs that are hard to achieve with traditional piecing alone.
Foundation paper piecing has a reputation for looking intimidating from the outside, all those sharp points and complicated angles that seem impossible to achieve by eye, and then feels almost too easy once you actually try it and realize the paper is doing most of the hard work for you. Foundation paper piecing is a technique where fabric is sewn directly onto a printed paper pattern, following numbered sections and stitching lines in a specific order, rather than cutting fabric pieces to precise shapes first and piecing them together the traditional way. Because the paper pattern controls exactly where each seam falls, this method produces remarkably precise results, even for complex, sharply pointed designs that would be genuinely difficult to achieve through standard rotary cutting and piecing alone. This guide covers what foundation paper piecing is, why quilters reach for it, and how to get started, remove the paper cleanly, and avoid the mistakes that trip up most beginners. It’s a technique well worth adding to your skill set even if you don’t plan to use it on every project, since it opens up entire categories of block designs that would otherwise stay out of reach. Bee’s Quilt Shop sees steady interest in this technique from quilters ready to tackle more intricate block designs than before.
What Foundation Paper Piecing Is
At its core, foundation paper piecing works by using a printed paper pattern as a stitching guide, with fabric pieces sewn onto the back of the paper in numbered order and stitching lines printed on the front for guidance. Each section of the pattern is numbered to indicate the order pieces should be added, and the fabric is placed on the unprinted side of the paper, then sewn directly along the printed lines from the printed side, using the paper itself as a stabilizing base throughout construction. Because the seam lines are already drawn out precisely on the pattern, there’s no need to measure or mark individual fabric pieces before sewing, the paper essentially does that calculating for you. This is part of why foundation paper piecing has become so popular for complex block designs, star points, and other shapes with narrow angles or many small pieces meeting at a single point, situations where traditional piecing methods leave a lot more room for tiny measurement errors to compound into a noticeably imperfect finished block.
Why Quilters Use Foundation Paper Piecing
Quilters gravitate toward foundation paper piecing largely because of the precision it delivers, particularly for designs that would otherwise be extremely difficult to piece accurately. Sharp points, whether in a star block, a compass design, or any pattern with narrow, acute angles, come out crisp and accurate almost automatically, since the paper pattern controls exactly where each seam falls regardless of how confidently a quilter can eyeball an angle. Complex, densely detailed designs also become far more approachable through paper piecing, since breaking a complicated image or block down into small, sequentially numbered sections makes even an intricate picture-style block manageable one small seam at a time. Beyond precision, many quilters appreciate that foundation paper piecing essentially removes guesswork from the equation, since as long as you follow the numbered order and sew directly on the printed lines, the finished piece will come out accurately sized and shaped regardless of how much piecing experience you have going in.
Materials Needed To Get Started
Getting started with foundation paper piecing requires a short list of specific materials beyond a standard sewing kit. Foundation paper itself, whether specialty paper piecing paper, lightweight vellum, or even plain printer paper for simpler patterns, needs to be sturdy enough to hold up to stitching but light enough to tear away cleanly once the block is finished. A shorter stitch length than typical piecing, generally somewhere in the range of 1.5 to 1.8 millimeters, is important too, since the smaller, more frequent perforations it creates in the paper make removal significantly easier once the block is done. Basic tools you likely already own round out the list, including an add-a-quarter or specialty paper piecing ruler, which helps trim seam allowances to a consistent quarter inch along the paper’s fold lines, along with a rotary cutter, a small pair of scissors for detail work, and a good iron for pressing each piece flat as you go. Having a well-lit, organized workspace matters more for this technique than for standard piecing, since keeping fabric pieces sorted and the pattern oriented correctly becomes genuinely important once a block has many small, similarly shaped sections.
Basic Foundation Paper Piecing Steps
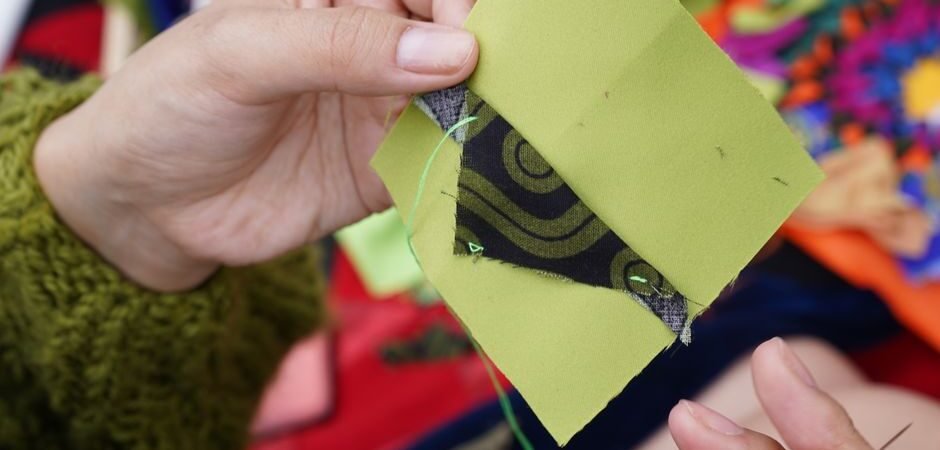
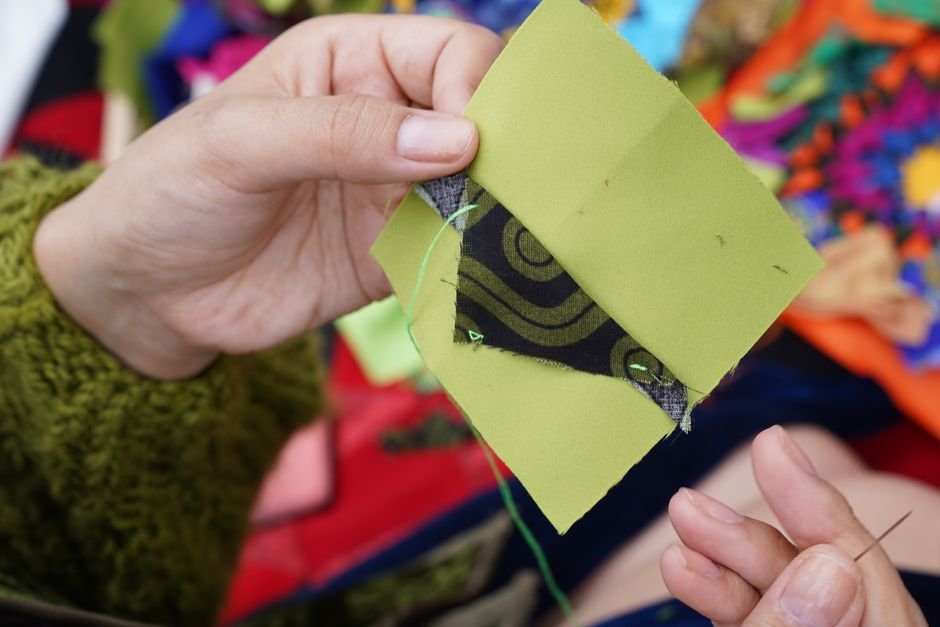
The general process of foundation paper piecing follows a consistent, sew-and-trim rhythm regardless of the specific pattern’s complexity. Working from the printed side of the paper, the first fabric piece is positioned over its numbered section on the unprinted side, then a second piece is placed right sides together with the first, aligned to cover the next numbered section with enough excess to form a seam allowance. Flipping back to the printed side, you sew directly along the line separating those two numbered sections, then flip back over, trim the seam allowance to a consistent width, and press the second piece open flat before moving to the next number in sequence. This same basic sew, trim, and press pattern repeats section by section until every numbered piece has been added, at which point the block gets trimmed along its outer seam allowance line, ready to be joined with other blocks. It sounds like a lot of steps written out, but the repetitive rhythm becomes genuinely quick once you’ve worked through the first few sections of any given pattern.
Removing Paper After Piecing
Removing the paper once a block is fully pieced is a satisfying final step, though it benefits from a bit of patience rather than rushing through it. Because the shorter stitch length used in paper piecing perforates the paper along every seam line, the paper generally tears away in clean sections rather than requiring it to be picked apart piece by tiny piece. Starting from a corner or edge and gently pulling the paper against the direction of the stitching, rather than straight up and away from the fabric, tends to release it more cleanly without putting excess stress on the seams underneath. For particularly small or tightly stitched sections, using a stiletto, seam ripper, or even a pair of tweezers to lift stubborn corners of paper can help without risking damage to the surrounding stitches. It’s worth double-checking that a block is fully finished, including any additional stitching that joins it to other blocks, before removing all the paper, since the paper can add helpful stability during that next construction step in some patterns.
Common Beginner Mistakes With Paper Piecing
A handful of predictable mistakes trip up most beginners working through their first few foundation paper piecing projects, and knowing them ahead of time helps avoid the most common frustrations. Insufficient fabric coverage is probably the most frequent issue, placing a fabric piece that looks generously sized on the unprinted side but doesn’t actually extend far enough to fully cover its numbered section once flipped and sewn, resulting in a small gap or thin sliver of missing fabric that only becomes obvious after trimming. Holding fabric up to a light source or window before sewing, checking that it fully covers the section with enough overlap for a seam allowance on every side, is a simple habit that prevents most of these coverage errors. Seam allowance confusion is another common stumbling block, particularly for quilters used to standard piecing, since paper piecing seam allowances get trimmed after stitching rather than measured and cut before, which can feel backward until it clicks. Taking the first pattern slowly, double-checking fabric placement before every stitch rather than rushing through, and accepting that the first block or two might come out a little imperfect while you’re still learning the rhythm all go a long way toward building genuine confidence with this technique.
Ready to try a more precise quilting technique? Explore our Quilt Patterns and Blocks library here at Bee’s Quilt Shop for more pattern-specific advice, and browse our current pattern collection to see what’s in stock right now. Explore more Quilting Techniques & Skills guides on the blog, or browse our Patterns collection to see what is currently available.
Frequently Asked Questions
Is foundation paper piecing hard to learn?
It looks more intimidating than it is, since the process is really a repeating rhythm of sewing, trimming, and pressing one small section at a time. Most quilters find it clicks after working through their first pattern, even if the very first block comes out a bit imperfect.
What kind of paper should I use for foundation paper piecing?
Specialty paper piecing paper or lightweight vellum works especially well since it tears away cleanly, though plain printer paper can work fine for simpler patterns too. At Bee’s Quilt Shop we suggest trying a lightweight specialty paper first if you plan to do much of this technique.
Why do I need a shorter stitch length for paper piecing?
A shorter stitch length perforates the paper more densely along the seam lines, which makes the paper tear away much more cleanly once the block is finished. Using a standard piecing stitch length can leave the paper harder to remove without disturbing the stitches.
Does foundation paper piecing waste more fabric than regular piecing?
It can use a bit more fabric than precisely cut traditional piecing, since pieces need generous coverage over each section before trimming, but many quilters find the tradeoff worth it for the precision gained. Planning slightly larger fabric pieces than you think you need helps avoid coverage gaps.
Can beginners try foundation paper piecing on their first quilt?
Yes, though starting with a simple pattern that has larger sections rather than a highly detailed design tends to be a more comfortable entry point. Working slowly through the first pattern and expecting a small learning curve helps set realistic expectations.
This article is intended for general educational and informational purposes only, based on common quilting practices. Results vary by pattern, skill level, and materials, so practicing on a simple design first is always a good idea. Bee’s Quilt Shop shares this guide as part of our ongoing library of quilting and sewing resources.