Quick answer: Learning how to make a quilt for beginners starts with basic cutting tools, a beginner-friendly pattern, and accurate piecing habits. The process covers cutting, assembling the quilt sandwich, and finishing with quilting and binding.
Learning how to make a quilt for beginners can feel genuinely overwhelming at first glance, given how many distinct steps and unfamiliar terms are involved in taking a project from a stack of fabric to a finished, usable quilt. But breaking the process down into its core stages makes the whole thing considerably more approachable than it looks from the outside, and countless quilters before you have started from exactly the same place of knowing nothing at all. This guide covers what you actually need before starting your very first quilt, how to choose a genuinely beginner-friendly pattern, the basics of cutting and piecing accurately, how the quilt sandwich comes together, an overview of quilting and binding to finish the piece, and realistic time expectations so you can pace yourself without unnecessary frustration. Whether you’ve been wanting to try quilting for years or you just picked up the itch recently, this guide covers the practical basics to get you from complete beginner to finished first quilt. At Bee’s Quilt Shop, helping first-time quilters get started with confidence is genuinely one of our favorite parts of what we do. There’s something special about watching someone go from feeling completely lost among all the terminology to confidently piecing their own blocks, and that transformation happens faster than most beginners expect once the process gets broken down into clear, manageable stages.
What You Need Before Starting Your First Quilt
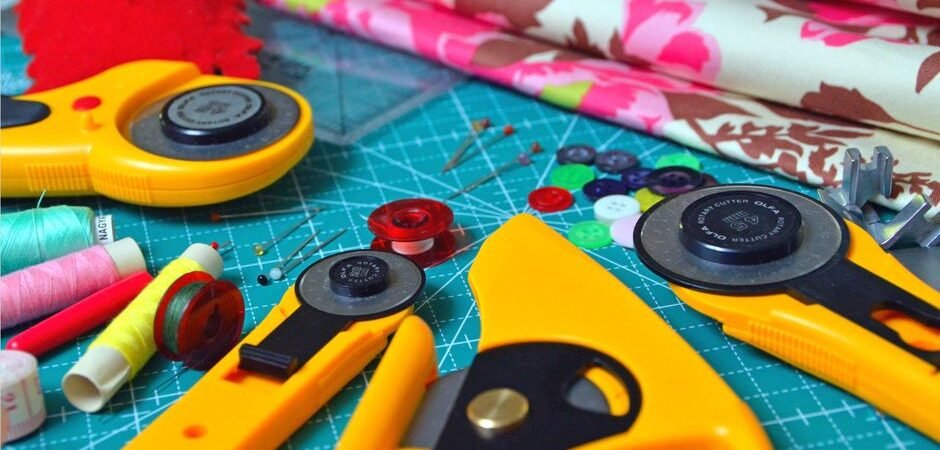
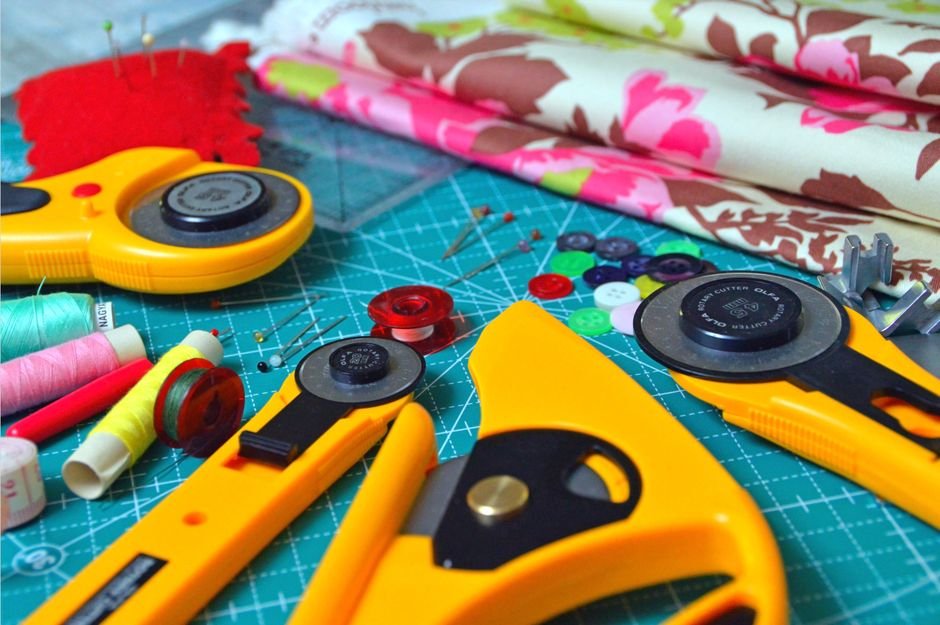
Before diving into your first quilt, a handful of basic tools and materials make the entire process considerably smoother than trying to improvise without them. A rotary cutter, self-healing cutting mat, and a clear acrylic ruler form the essential cutting toolkit, allowing far more accurate and efficient cutting than scissors alone could realistically achieve. A sewing machine capable of a straight stitch is really all you need mechanically, though a walking foot attachment makes the actual quilting step considerably easier once you get there. Fabric requirements depend entirely on your chosen pattern and finished size, but buying a bit more than the stated minimum is a reasonable habit for a first project, giving you margin for the inevitable small cutting mistakes that come with learning. Beyond these core tools, pins or clips, a good pair of fabric scissors for detail trimming, and a reliable iron round out the essential beginner toolkit without requiring an overwhelming initial investment. It’s genuinely worth resisting the temptation to buy every specialty gadget marketed toward quilters right at the start, since this simple core toolkit handles a first project perfectly well, and specialty tools are much easier to appreciate once you actually understand the specific problem they’re designed to solve.
Choosing A Beginner-Friendly Pattern
Choosing a genuinely beginner-friendly pattern for your first quilt matters enormously for how enjoyable and successful the whole experience feels. Simple block styles built from squares and rectangles, like a basic nine patch or a straightforward strip quilt, avoid the added complexity of angled or curved piecing that can trip up a first-time quilter and turn an exciting project into a frustrating one. Patterns designed around precut fabric, like charm packs or layer cakes, remove a significant chunk of the early cutting and color-coordination work, letting a beginner focus their limited experience on the actual piecing and sewing process instead. It’s also worth choosing a modest finished size for a first project, like a baby quilt or small lap quilt, rather than jumping straight into a full bed-sized quilt, since a smaller project reaches the satisfying finish line considerably faster and teaches the same fundamental skills along the way. Many quilting teachers specifically steer brand new students toward a table runner or small wall hanging as an even smaller first step before a full baby quilt, simply to build basic comfort with the sewing machine and fabric handling before committing to anything larger.
Cutting And Piecing Basics
Cutting and piecing accuracy forms the foundation that everything else in quilting builds on, and it’s worth taking this stage seriously even though it can feel tedious compared to the more visibly rewarding assembly steps. Measuring twice and cutting once, a piece of advice that applies to quilting just as much as any other trade, prevents a lot of the frustration that comes from discovering a cutting error only after fabric has already been committed to a project. A consistent, accurate quarter inch seam allowance is genuinely one of the most important skills a beginning quilter can develop, since even small deviations compound noticeably across a project with many pieced seams, throwing off block sizes in ways that create real headaches during final assembly. Pressing seams consistently as you go, rather than saving all your pressing for the end, keeps each step accurate and makes it much easier to catch and correct small mistakes early, before they’ve had a chance to compound across multiple pieced units. Using a consistent presser foot or seam guide specifically marked for a quarter inch seam removes a lot of the guesswork from this step too, since it gives your eye and hand a physical reference point to follow rather than relying purely on careful judgment for every single seam.
Assembling The Quilt Sandwich
Assembling the quilt sandwich, the layered structure of quilt top, batting, and backing fabric that gets quilted together, is a genuinely important step that many beginners underestimate in importance. The backing fabric goes down first, right side facing down, followed by the batting layer, and finally your completed pieced quilt top facing right side up on top, with all three layers smoothed flat and free of wrinkles or puckers before securing them together. Basting, the process of temporarily securing all three layers together using pins, fabric-safe adhesive spray, or long hand-basting stitches, prevents the layers from shifting or bunching once you start the actual quilting process, and skipping or rushing this step is a common beginner mistake that leads to genuinely frustrating puckers and shifts showing up in the middle of quilting. Taking the time to smooth and secure this sandwich carefully, working from the center outward toward the edges, sets up everything that follows for success. Working on a large, flat, clean surface, like a dining table or clean floor, rather than trying to baste a quilt sandwich on a bed or other soft, uneven surface, also makes it considerably easier to keep everything smooth and properly aligned throughout this step.
Quilting And Binding Your First Quilt
Quilting and binding are the two finishing steps that transform a basted quilt sandwich into an actual finished, usable quilt. Quilting itself, the stitching that holds all three layers together permanently while also adding decorative texture, can be as simple as straight lines stitched with a walking foot or as elaborate as detailed free motion designs, and beginners generally find success starting with simple straight-line or gentle grid quilting before attempting more decorative approaches. Binding, the fabric strip that wraps around and finishes the raw outer edges of the quilt, involves cutting bias or straight-grain strips, attaching them around the perimeter, and then folding and stitching them down to enclose the raw edges cleanly. Both of these finishing steps benefit enormously from watching a video demonstration alongside written instructions, since the specific hand motions involved are often considerably easier to understand visually than to picture from text description alone. Some beginners even choose to send their first quilt top out to a longarm quilter for the actual quilting step, focusing their own first-project energy on piecing and binding while leaving that particular skill for a future project once they’re ready to tackle it themselves.
Realistic Time Expectations For A First Quilt
Setting realistic time expectations for your first quilt genuinely matters for keeping the whole experience enjoyable rather than frustrating. A first quilt, particularly a smaller project using a beginner-friendly pattern, might take anywhere from several weekends to a couple of months of steady, part-time work, though this varies enormously based on your available time, the project’s complexity, and how much troubleshooting a first attempt naturally requires. It’s genuinely normal, not a sign of doing something wrong, for a first quilt to take considerably longer than an experienced quilter’s estimate for the same pattern, since building new skills alongside actual project progress takes real time that a seasoned quilter’s estimate doesn’t typically account for. Treating your first quilt as a genuine learning project rather than a race toward a finished product tends to produce both a more enjoyable process and a better final result, since patience with your own learning curve is honestly one of the most valuable things a beginning quilter can bring to that very first project. Celebrating that finished first quilt for what it actually represents, real new skills built from scratch, matters more than judging it against the work of a quilter with decades more practice behind them.
Ready to start your very first quilt? Explore our Quilt Patterns and Blocks guides here at Bee’s Quilt Shop for more pattern advice, and browse our current patterns collection to see what’s available right now. Explore more Quilt Patterns & Blocks guides on the blog, or browse our Patterns collection to see what is currently available.
Frequently Asked Questions
What tools do I actually need to start my first quilt?
A rotary cutter, self-healing cutting mat, clear acrylic ruler, sewing machine, pins or clips, and a reliable iron cover the essential beginner toolkit. A walking foot attachment makes the quilting step easier once you get there.
What pattern should a complete beginner start with?
Simple block styles built from squares and rectangles, like a basic nine patch or strip quilt, avoid the added complexity of angled or curved piecing that can trip up a first attempt.
What is a quilt sandwich and how do I assemble it?
It’s the layered structure of backing, batting, and quilt top that gets quilted together, assembled with the backing facing down, batting in the middle, and the pieced top facing up, then basted to prevent shifting.
How long does a first quilt usually take to finish?
It varies enormously based on available time and project complexity, but a smaller beginner-friendly project might take several weekends to a couple of months of steady, part-time work.
Is it normal for my first quilt to take longer than expected?
Yes, this is genuinely normal rather than a sign of doing something wrong, since building new skills alongside project progress takes real time. Bee’s Quilt Shop encourages treating a first quilt as a learning project, not a race.
This article is intended for general educational and informational purposes only, based on common quilting practices. Results vary by skill level, pattern choice, and available time, so pacing yourself without rushing is always a good idea. Bee’s Quilt Shop shares this guide as part of our ongoing library of quilting and sewing resources.