Quick answer: This walkthrough shows exactly how to make a simple lap-size nine patch quilt from start to finish, using 5-inch squares, 20 blocks, and step-by-step cutting, piecing, and finishing instructions.
This walkthrough shows exactly how to make a simple lap-size quilt using a traditional nine patch block, with real measurements and specific step numbers rather than general advice, so you can follow along and end up with an actual finished quilt rather than just a broad understanding of the process involved from start to finish. This project uses a 4-by-5 grid of nine patch blocks made from 5-inch squares, with each finished block measuring 13.5 inches, producing a finished lap quilt top roughly 54 by 67.5 inches before borders, a manageable size for a first project that still teaches every core quilting skill from cutting through binding start to finish. If you’ve read general beginner overviews before but wanted an actual project to follow start to finish, this is that project, written specifically so you can gather exactly what’s needed and get started the very same day without any further research needed. This guide covers exactly what you’ll need, cutting your squares to size, piecing the nine patch blocks, assembling and squaring the quilt top, layering and quilting, and binding and finishing the completed piece. At Bee’s Quilt Shop, we love pointing first-time quilters toward a concrete project like this rather than leaving them to figure out the specifics on their own from a vague, general overview that never quite gets specific enough.
What You’ll Need For This Simple Nine Patch Quilt
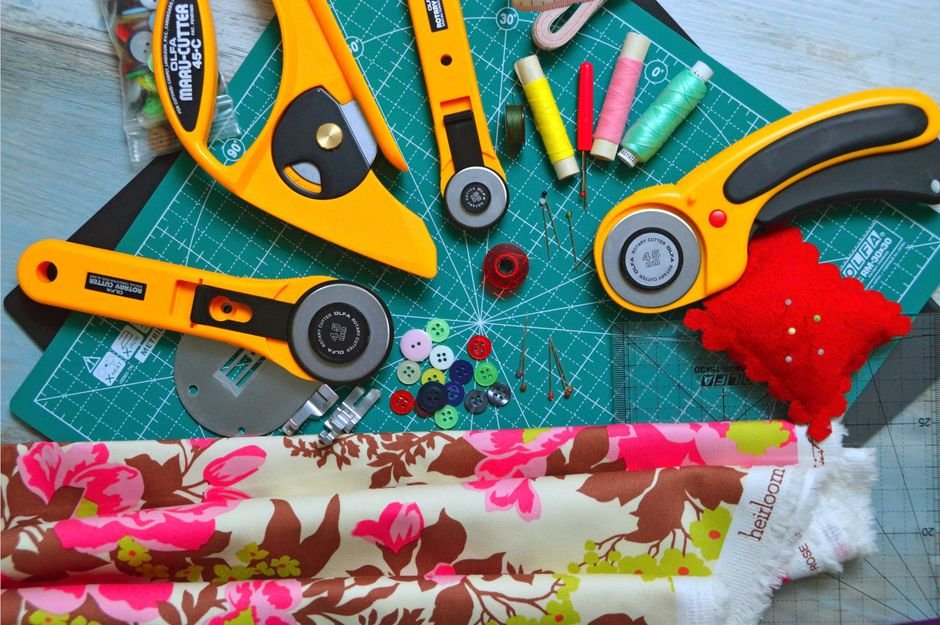
For this specific project, you’ll need approximately 3 yards total of quilting cotton across five to seven coordinating fabrics, a piece of batting at least 62 by 76 inches, backing fabric of the same minimum size, and roughly a half yard of binding fabric for the finished edge all around. Beyond fabric, gather a rotary cutter, a self-healing cutting mat, a 6.5 by 24 inch ruler, your sewing machine set up with a quarter-inch foot if you happen to have one, neutral thread, and basting pins or spray adhesive for the layering step later on in the process. Having every item gathered before you start cutting keeps the whole project moving smoothly without frustrating mid-project supply runs to a fabric shop for something you didn’t realize you’d need until you were already halfway through cutting. It’s also worth setting aside a clear, uninterrupted stretch of table space for cutting, since accurate cutting is genuinely harder on a cramped or cluttered surface than a properly organized and well-lit one.
Step 1: Cutting Your Squares To Size
Step 1 involves cutting 5-inch squares from your chosen fabrics: for this 20-block quilt, you’ll need 180 total squares across your coordinating fabrics, since each nine patch block uses 9 squares arranged in a simple grid pattern. A practical approach is cutting 5-inch strips first using your rotary cutter and ruler, then subcutting each strip into 5-inch squares, which is considerably faster than cutting individual squares one at a time from a flat piece of fabric spread out on your mat. Keep squares organized by fabric as you cut, either in labeled stacks or separate small bins, since you’ll want a mix of light, medium, and dark values within each individual block for genuine visual contrast once everything is pieced together into finished rows.
Step 2: Piecing The Nine Patch Blocks
Step 2 is piecing the nine patch blocks themselves, working with a consistent quarter-inch seam allowance throughout every single seam in each block you carefully assemble. Arrange 9 squares in a 3-by-3 grid for each block, alternating fabric placement so lighter and darker squares create visual contrast within the block rather than clustering similar values together in one corner of the design. Sew the squares into three rows of three, press seams in alternating directions row to row, then sew the three rows together, nesting the pressed seams against each other for cleaner, flatter intersections where the seams meet at each corner point. Repeat this process 20 times total to complete every block for the quilt top, checking each finished block against your ruler to confirm it measures the expected 13.5 inches before moving on to the next one waiting in your stack.
Step 3: Assembling And Squaring The Quilt Top
Step 3 is assembling all 20 finished blocks into your 4-by-5 grid, sewing blocks together into rows first, then sewing the completed rows together into the full quilt top as one single, unified piece. Press seams between blocks in alternating directions row to row, just as you did within each individual block earlier, to help intersections lie as flat as possible once the entire top is fully assembled and ready for the next stage of construction. Once fully assembled, measure and square up the completed top with your ruler, trimming any uneven edges before moving on to layering, since a slightly crooked top will only become more obvious once it’s quilted and bound around its entire perimeter.
Step 4: Layering, Basting, And Quilting
Step 4 is creating your quilt sandwich by layering backing fabric face down, batting in the middle, and your pieced top face up, then basting all three layers together with pins or spray adhesive to prevent shifting during the actual quilting process that follows immediately after. For this beginner project, straight-line machine quilting using a walking foot, either following a simple grid or stitching diagonally through the blocks, produces a clean, classic result without requiring advanced free-motion skills you haven’t yet had a genuine chance to practice. Quilt from the center outward in both directions to help push any excess fabric toward the edges as you go along, checking periodically that the backing hasn’t developed any small tucks or puckers along the way as you steadily work.
Step 5: Binding And Finishing Your Quilt
Step 5 is binding and finishing your completed quilt, the final step that transforms a quilted piece into a genuinely usable finished project ready for everyday use around the house. Trim the quilted layers evenly around all four edges, cut and piece your binding fabric into long strips, then attach it around the perimeter, mitering the corners for a clean, professional-looking finish at each and every corner of the quilt. Fold the binding to the back and either machine or hand stitch it down to complete the quilt, taking your time on this final step since a rushed binding tends to show clearly on close inspection by anyone who looks closely later. With this final step done, you’ll have a genuinely finished, functional quilt made entirely from scratch using measurements you can confidently repeat, resize, or adapt on your very next quilting project down the road. Consider adding a small fabric label to the back of the quilt noting the date and maker, since this simple detail becomes genuinely meaningful information for whoever owns the quilt many years from now. Once washed and dried for the first time, a cotton quilt made this way typically develops a soft, slightly crinkled texture that many quilters find even more appealing than the crisp, freshly finished look it had right off the machine. Photographing the finished quilt in good natural light before it ever gets used is also worth doing, since that first, unwashed photo makes a genuinely nice keepsake alongside the physical quilt itself. Many first-time quilters are surprised by how quickly a project like this comes together once the individual steps are broken down clearly, rather than approached as one intimidating, undifferentiated task all at once. Completing this first lap quilt also gives you a genuine template to reference for a second, larger project, since the same nine patch block and general process scale up easily to a bigger grid and a larger finished size. Many quilters describe their first finished quilt as the moment the whole craft finally clicked for them, transforming quilting from an abstract idea into a genuinely achievable, repeatable skill they now feel confident applying to future projects of their own choosing, whatever size, block, or pattern style they decide to tackle next, now that the fundamentals of cutting, piecing, layering, quilting, and binding are all genuinely comfortable and familiar territory to work from confidently.
Ready to start cutting your first squares? Browse our Sewing Projects and Patterns for more step-by-step guides, or explore our Patterns collection to see what’s currently available.
Frequently Asked Questions
What size squares does this nine patch project use?
This walkthrough uses 5-inch squares, giving finished 13.5-inch nine patch blocks once seams are sewn, which keeps the math simple for a first quilt project.
How many blocks make up this simple quilt?
This project uses a 4 by 5 grid of nine patch blocks, which produces a lap-size quilt top around 54 by 67.5 inches before borders are added.
What’s the basic order of steps for this project?
Cut your squares, piece the nine patch blocks, assemble and square the quilt top, layer and baste with batting and backing, quilt, then bind the edges.
Do I need a walking foot to quilt this project?
A walking foot is recommended for straight-line machine quilting since it feeds all three layers evenly and helps prevent puckering on a beginner project.
How long does a project like this typically take?
Working in short sessions, a lap-size nine patch quilt like this typically takes a beginner several weekends from cutting through binding.
This article is intended for general educational and informational purposes only, based on common quilting practices. Measurements assume standard quarter-inch seam allowances. Bee’s Quilt Shop shares this guide as part of our ongoing library of quilting and sewing resources.